
Are you looking to enhance the aesthetic appeal of your home with a new flooring option? If so, installing tile floor could be the perfect solution for you. In this tutorial, we will provide you with essential tips and troubleshooting advice to help you successfully set up your new tile flooring.
From selecting the right type of tile to preparing the subfloor and laying the tiles in a professional manner, this tutorial will cover all the key aspects of the setup process. Additionally, we will address common issues that may arise during installation, offering practical solutions to ensure a smooth and seamless flooring project.
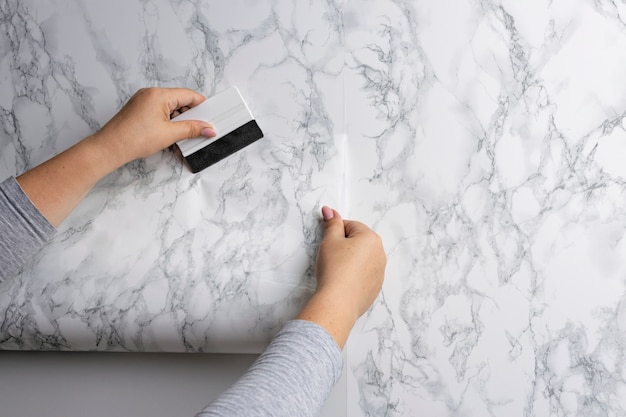
Installing Your New Tile Surface

When setting up your new tile floor, it’s crucial to follow a well-structured plan to ensure a successful outcome. This tutorial will walk you through the process of troubleshooting any issues that may arise during the installation of your new tile surface.
First and foremost, make sure you have all the necessary materials and tools on hand before you begin. Proper preparation is key to a smooth and efficient setup. Take your time to familiarize yourself with the layout of the tiles and plan ahead for any obstacles you may encounter along the way.
As you start laying down the tiles, pay close attention to the spacing between each tile to ensure a consistent and professional-looking finish. If you run into any issues, such as tiles that are not properly adhering to the floor or uneven edges, don’t panic. Take a step back, assess the situation, and address the problem before moving on to the next tile.
Throughout the installation process, don’t rush. Take your time to carefully place each tile and make adjustments as needed. Remember, patience and attention to detail are crucial when setting up your new tile floor. By following this guide, you’ll be well on your way to enjoying a beautiful and durable tile surface in your home.
Preparing the surface
In this section of the tutorial, we will cover the essential steps to setup your surface before starting the tiling process. Proper preparation of the surface is crucial to ensure a successful installation. Follow these tips to avoid common troubleshooting issues down the line.
Clearing the area: Before you begin the tiling project, make sure the floor is clear of any obstructions and debris. Sweep and vacuum the surface to ensure it is clean and level.
Repairing cracks and holes: Inspect the surface for any cracks or holes and fill them in with an appropriate filler. This will prevent any unevenness in the floor that could affect the tiling process.
Priming the surface: Applying a primer to the surface will help the mortar bond better with the floor, ensuring a strong and durable installation. Make sure to follow the manufacturer’s instructions for the specific primer you are using.
Leveling the surface: Use a leveling compound to ensure the floor is flat and even. Uneven surfaces can cause tiles to crack or shift over time, so this step is crucial for a long-lasting tile floor.
By following these steps to prepare the surface, you will set yourself up for a successful tiling project. Taking the time to properly prepare the floor will save you time and frustration in the long run.
Choosing the right tiles
When setting up your new floor, one of the most important factors to consider is selecting the appropriate tiles. This tutorial will provide you with tips on how to choose the perfect tiles for your project.
Mixing the mortar
Before starting the installation process of your new floor, it is important to properly mix the mortar to ensure a strong and durable bond between the tiles and the subfloor. This tutorial will guide you through the setup and troubleshooting of mixing the mortar for your tile installation project.
- Start by setting up all the necessary tools and materials, including a mixing bucket, a drill with a mixing paddle attachment, water, and the mortar mix.
- Follow the manufacturer’s instructions on the mortar mix packaging to determine the correct ratio of water to mix. It is crucial to achieve the right consistency for optimal adhesion.
- Pour the specified amount of water into the mixing bucket, then slowly add the mortar mix while continuously stirring with the drill attachment. Make sure to mix thoroughly to avoid any lumps or dry spots in the mortar.
- Adjust the water or mortar mix as needed to reach the desired consistency. The mortar should be smooth and creamy, not too wet or dry.
- If the mortar is too dry, add small amounts of water until the desired consistency is achieved. Conversely, if the mortar is too wet, sprinkle in more mix and remix until it thickens up.
- Once the mortar is properly mixed, let it sit for a few minutes to allow the ingredients to bond together. This process is known as slaking and helps to improve the overall performance of the mortar.
By following these steps, you will ensure that your mortar is correctly mixed and ready for use in your tile installation project. Properly mixed mortar is essential for a successful and long-lasting floor installation, so take your time and troubleshoot as needed to achieve the best results.
Laying the tiles
In this tutorial, we will discuss the setup and troubleshooting tips for laying the tiles. Whether you are a DIY enthusiast or a professional, this guide will provide you with valuable insights on how to efficiently lay tiles on your floor.
| Setup: | Before starting the tiling process, make sure to prepare the surface properly. Clean the floor thoroughly and ensure it is level. Use the right adhesive and tools for the job to ensure a smooth installation. |
| Tips: | When laying tiles, start from the center of the room and work your way outwards. Use spacers to maintain an even gap between the tiles. Double-check your measurements to ensure precise placement. |
| Troubleshooting: | If you encounter any issues while laying the tiles, such as uneven surfaces or adhesive not sticking properly, take a step back and reassess the situation. Adjust your approach accordingly to achieve the desired results. |
Grouting the tiles
Once you have completed the setup of your new tile floor, it is time to move on to the next step in the process. This tutorial will provide you with a comprehensive guide on how to properly grout the tiles to ensure a polished and professional finish.
Grouting is an essential part of the tiling process as it not only fills in the gaps between the tiles, but also helps to secure them in place. In this section, we will cover everything from selecting the right grout color to troubleshooting common issues that may arise during the grouting process.
Follow these tips to achieve a smooth and seamless finish when grouting your newly installed tiles. Make sure to take your time and pay attention to detail to ensure a high-quality end result.
Sealing the tiles for durability
Ensuring the longevity and resilience of your newly installed tiles is crucial for maintaining the overall quality and appearance of your flooring setup. One essential step in this process is sealing the tiles to provide an added layer of protection against wear and tear, stains, and moisture.
By following this tutorial on sealing your tiles, you can enhance their durability and ease of maintenance, thus prolonging the life span of your beautiful flooring. This troubleshooting guide will help you navigate the process of selecting the right sealant, applying it correctly, and addressing any potential issues that may arise during the sealing process.
Tile floor troubleshooting
When setting up your tile floor, you may encounter some issues that need troubleshooting. Here are some tips to help you address common problems that may arise during the installation process.
- If you notice that the tiles are not lining up properly, double-check your tile layout and make sure you are following the tutorial instructions correctly.
- In case of uneven tiles or gaps between them, adjust the adhesive underneath the tiles to ensure a smooth and consistent floor surface.
- If you experience tiles cracking or breaking during installation, check the subfloor for any structural issues that may be causing this problem.
- For tiles that are not sticking to the floor properly, try using a different adhesive or cleaning the subfloor thoroughly before laying down the tiles.
- If you encounter grout issues, such as discoloration or crumbling, consider applying a sealant to protect the grout and prevent future damage.
Question-answer:
What tools do I need to install a tile floor?
To install a tile floor, you will need the following tools: tile cutter, trowel, grout float, spacers, level, rubber mallet, sponge, grout sponge, bucket, and gloves.
Is it difficult to install a tile floor yourself?
Installing a tile floor can be a bit challenging, especially if you are a beginner. However, with the right tools, materials, and step-by-step guide, you can successfully install a tile floor yourself.
What are some common issues when installing a tile floor?
Some common issues when installing a tile floor include uneven tiles, grout cracking, tiles not sticking properly, and grout haze. These issues can be avoided by ensuring proper surface preparation and following careful installation instructions.
How do I troubleshoot cracked tiles on my tile floor?
If you have cracked tiles on your tile floor, you can troubleshoot by carefully removing the cracked tile, replacing it with a new one, and reapplying grout. Make sure to check for any underlying issues that may have caused the tile to crack in the first place.
Do you have any tips for maintaining a tile floor?
To maintain a tile floor, regularly sweep or vacuum to remove dirt and debris, clean up spills promptly, use a neutral cleaner to mop the floor, and reseal grout lines annually. Taking these steps will help keep your tile floor looking its best.
What tools do I need to install a tile floor?
To install a tile floor, you will need the following tools: a tile cutter, a trowel, spacers, a level, a sponge, a bucket, grout, mortar, and of course, the tiles themselves.